The Perfect Roasted Eggplants
Roasted eggplants on the grill – the basic ingredient for endless delicious recipes!
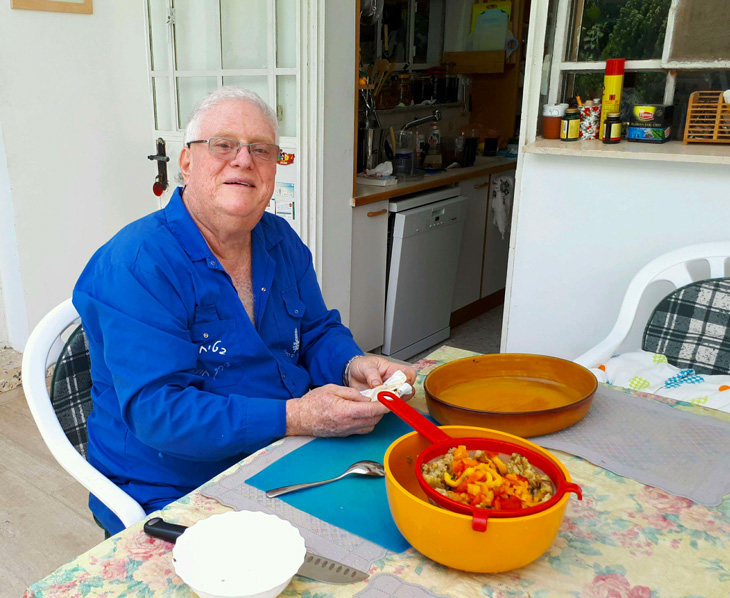
This is how my dad does it. I spent the weekend with my parents and took down notes, pictures and lots of tips and secrets he has accumulated over decades of grilling.
You can skip the story and jump straight to the list of steps here,
But do scroll down for all the secrets that make the perfect eggplant salad.
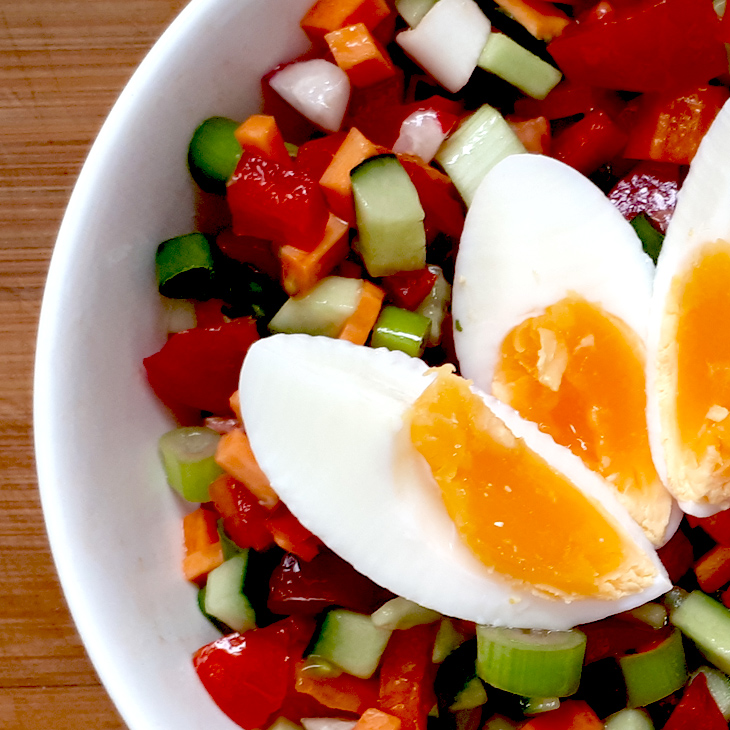
Also, don't miss the recipe for eggplant salad with peppers and garlic.
My dad says:
"Preparing roasted eggplants requires some patience"
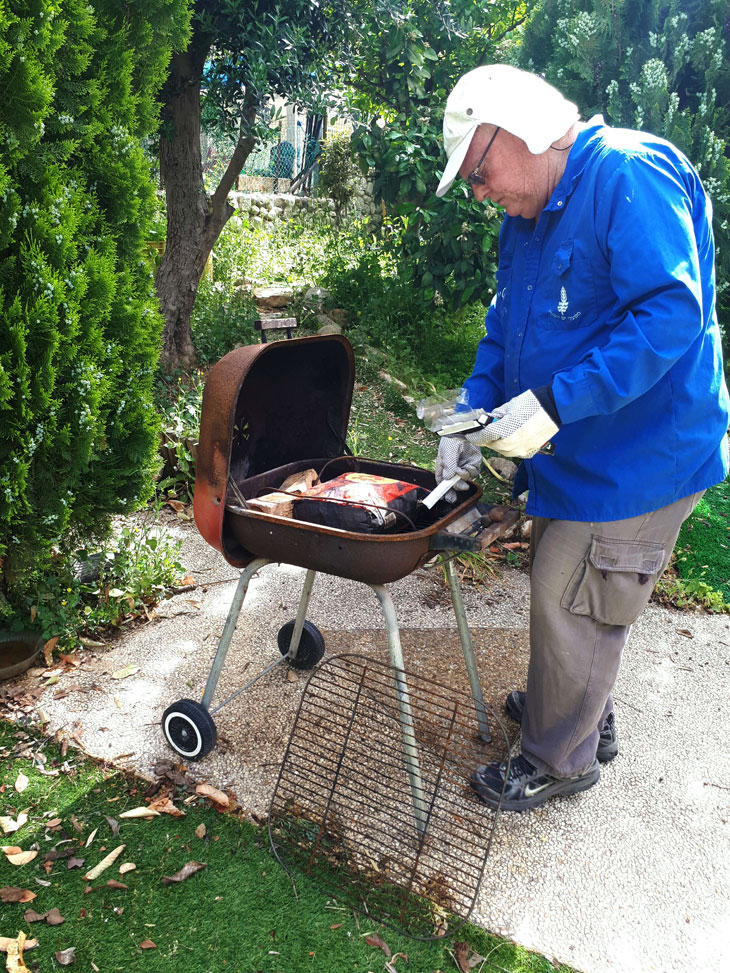
Start the fire
My dad uses coal and coal-starter, no wood.
Break up the fire starter into cubes, put them under the coal pack and light it up. The wrapper will burn and release its content into the grill.
We'll arrange the coal bits nicely, later.
 "…I had long matches somewhere – can't find them now,
 so let's just use a paper towel from the kitchen."
The cats stand around to watch.
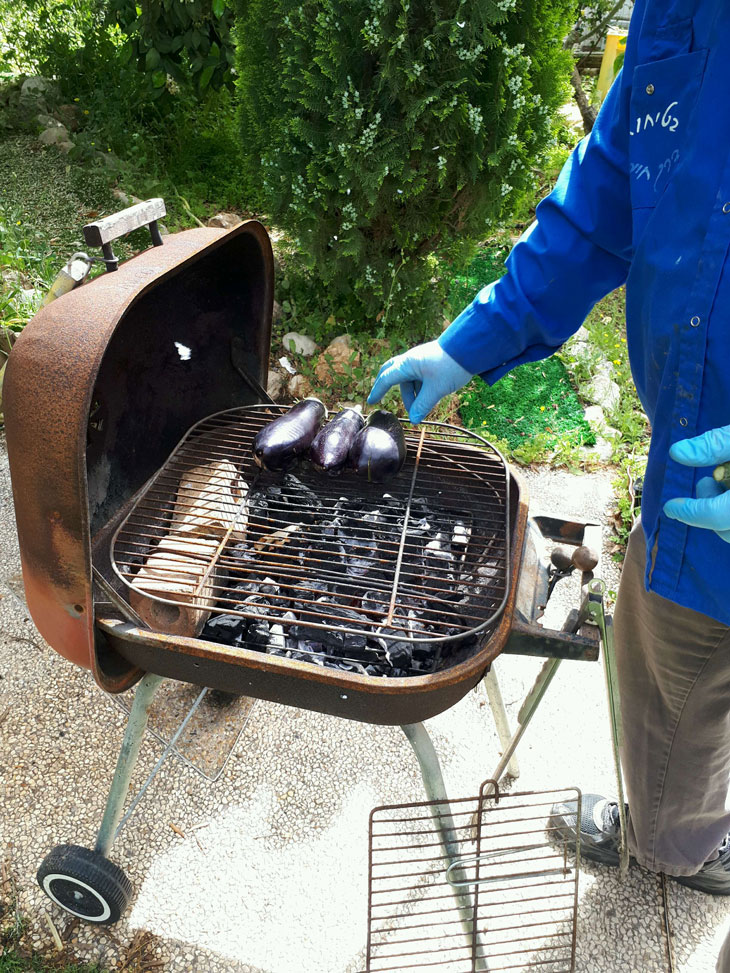
We dress up for the sun – long sleeves, hat. Gloves for handling the grill.
My dad was a safety officer in a chemistry lab – his shirt says: "safety is a way of life".
Now he's retired, but good habits stay with you :-)
He gathers all the grill-tools from around the back yard –a long fork and a pair of tongs, while we wait for the coals to catch.
Food on the Mangal, on the grill, is simply "Al Ha-Esh" meaning "on the fire". Eggplants on the fire, that's what we're making here.
Arrange the coals in the grill - spread them evenly.
Now we wait for them heat up, and go prepare the eggplants.
Preparing the Eggplants for Roasting
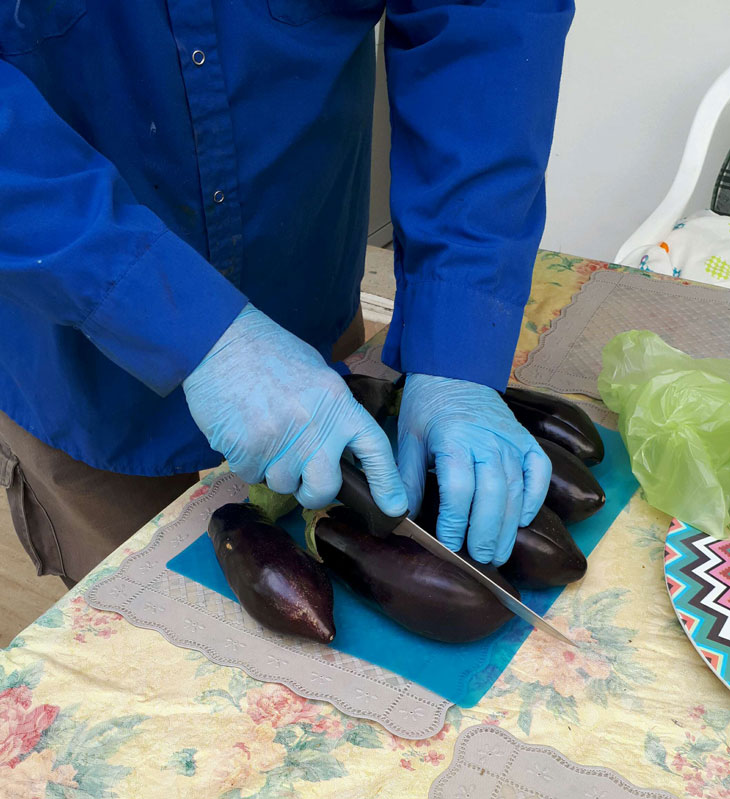 Make a deep cut, but don't split the eggplant
Pick nice hard and shiny eggplants. These will have less seeds inside.
Make a very deep cut along one side of the eggplant. You want to open it up, but DO NOT cut it in two.
We will put them on the grill with the cut facing down, to drain all the fluids.
It's best if there are as little seeds as possible. If the eggplant you have has a lot of seeds, the fluids will be bitter, so you'll have to set the roasted eggplants to drain for another 24 hours after they come off the fire.
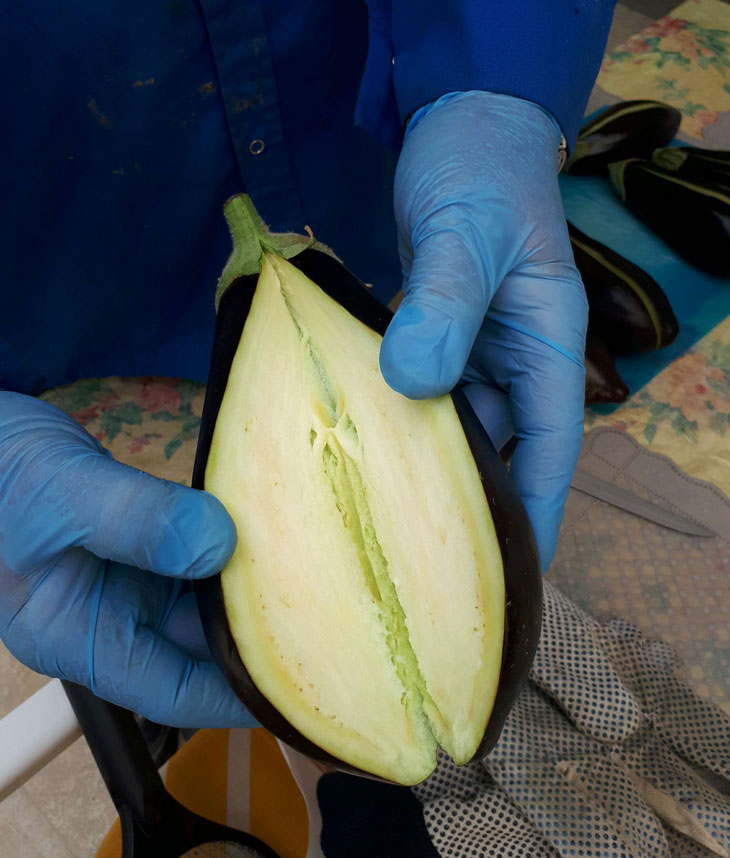 Shiny hard and fresh eggplants will likely have less seeds.
 This one is perfect
Draining as much of the fluids as possible is the main goal here
You want to be patient in all the stages of preparation, and let the "flesh of the eggplant" drain as much as possible.
The reason we're working so hard to drain them is, that all these fluids are bitter and not tasty.
 A BBQ Grill in Hebrew is called "Mangal"
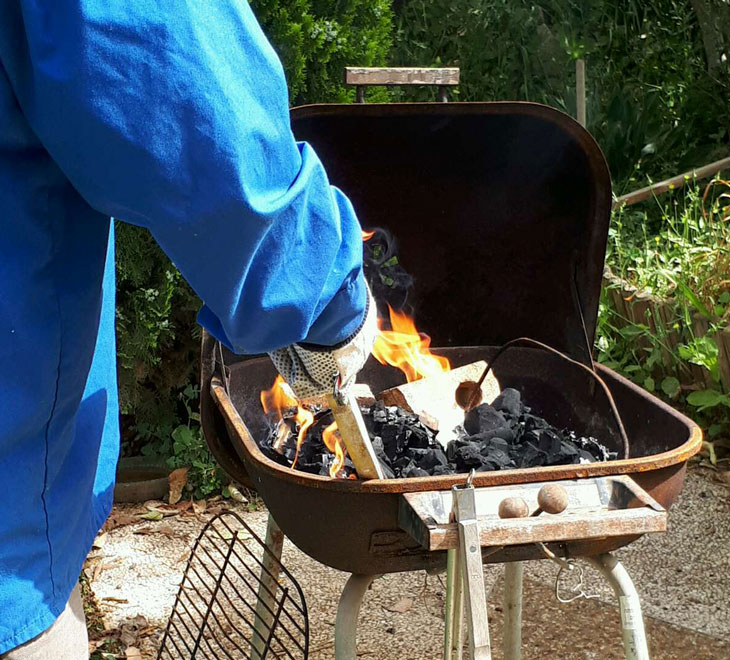
Tend to the fire: It takes it's time.
We wait till there's no more yellow fire, only burning coals. Today is windy, which helps. If the air is still you can use a fan. Or a "Naf-naf".
Tip:
Don't roast vegetables over a yellow flame – only over hot coals.
If you do, the skin will get covered with soot, which gets into the food.
A, it's not healthy, and B, it's bitter.
If you want a smoky effect, put some leaves of a garden herb into the grill – rosemary or za'atar or something like that.
Once the coals turn white the grill is hot enough – it’s time to grill!
Grilling
Place the eggplants on the grill, with the cut facing DOWN, so all the fluids will drain.
Leave for 10 minutes.
Flip them with the cut up, for another 10 minutes.
While we're here, might as well put more veggies on the grill – how about some sweet peppers? Onions, carrots – whatever you like.
We're going to put the roasted peppers in the eggplant salad, if mom agrees.
Drink some water! and wait in the shade :-)
 Flip 1- bring the cuts to face up now.
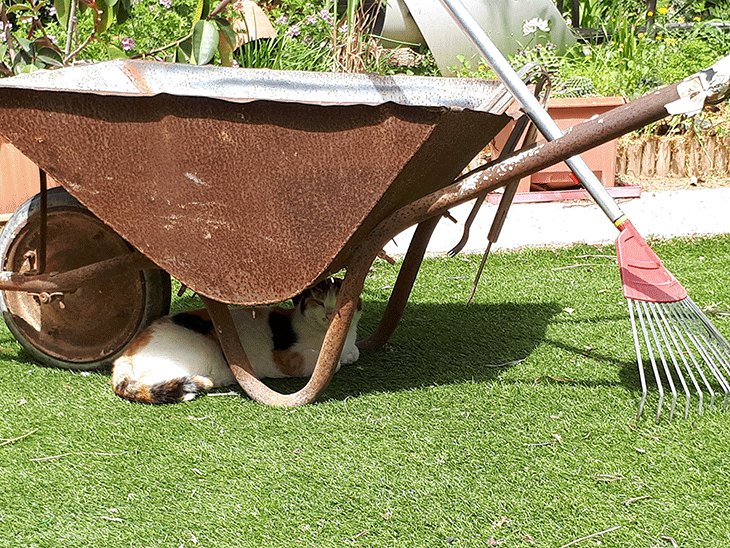 Sun smart cat
While we wait for the eggplants to cook, the neighbor gives us some loquat fruits from her tree. This is the season – late April, the trees are bursting with them. They're called Shesek in Hebrew. Look at this tree near my house!
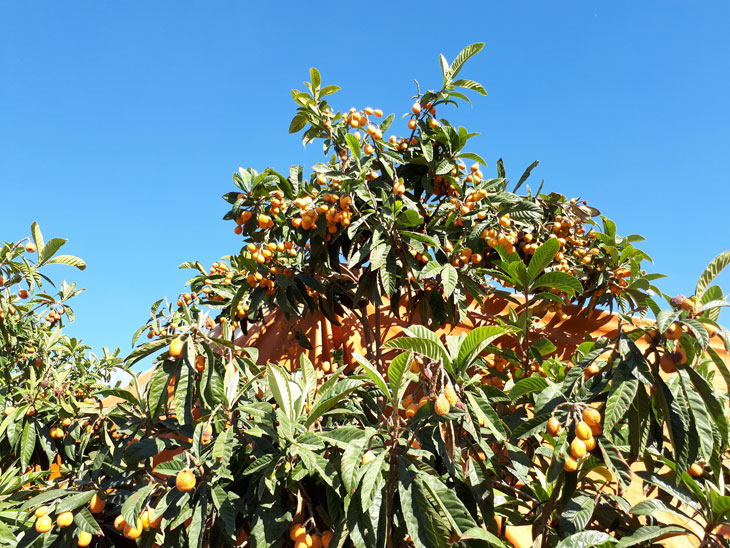 Shesek - loquat tree
Dad did say in the beginning - this take some patience.
The eggplants are starting to change color from purple to brown.
The pale insides are getting a deeper color. With the cut facing up, they are cooking inside themselves.
You can see bubbles where they are boiling inside, and the most wonderful smell starts to rise.

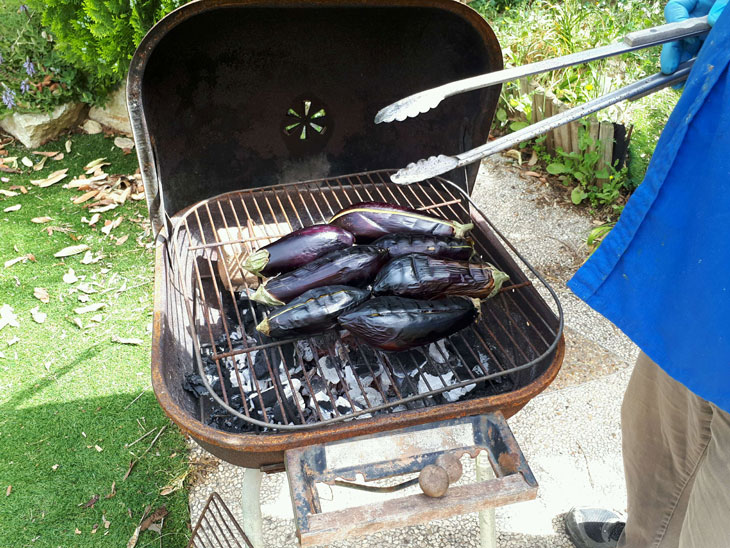
Turn them again (3rd time), cut facing down. All the fluids will drain, leaving a tender meaty texture.
You can really see the color change, from purple to brown. Where the coals were hotter they've cooked more.
He re-arranges their places on the grill.
"What's great about eggplants," my dad says, "is that they cook inside their natural package :-)"
Test with the fork – are they soft yet?
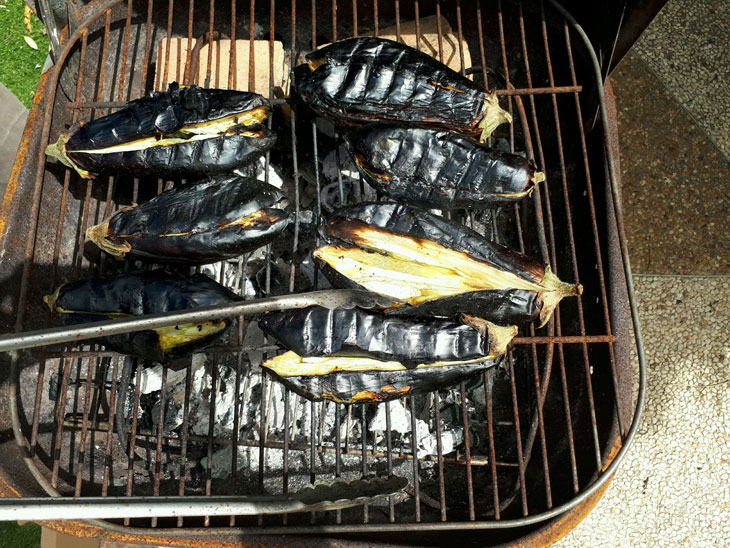 You can see the skin starting to peel in some places – it's a good sign, means it's cooking.
Time to "le-man-gel" with the Naf-Naf
Important tip
Fan the fire only when the cut in the eggplants is facing UP.
Otherwise, all the ash will rise into the eggplants… and you don’t want to eat that.
It's not an Israeli grill, "mangal", without vigorously waving the naf-naf, or as some call it - "le-man-gel".
Basically, you take a piece of hard carton and vigorously wave the air on the grill.
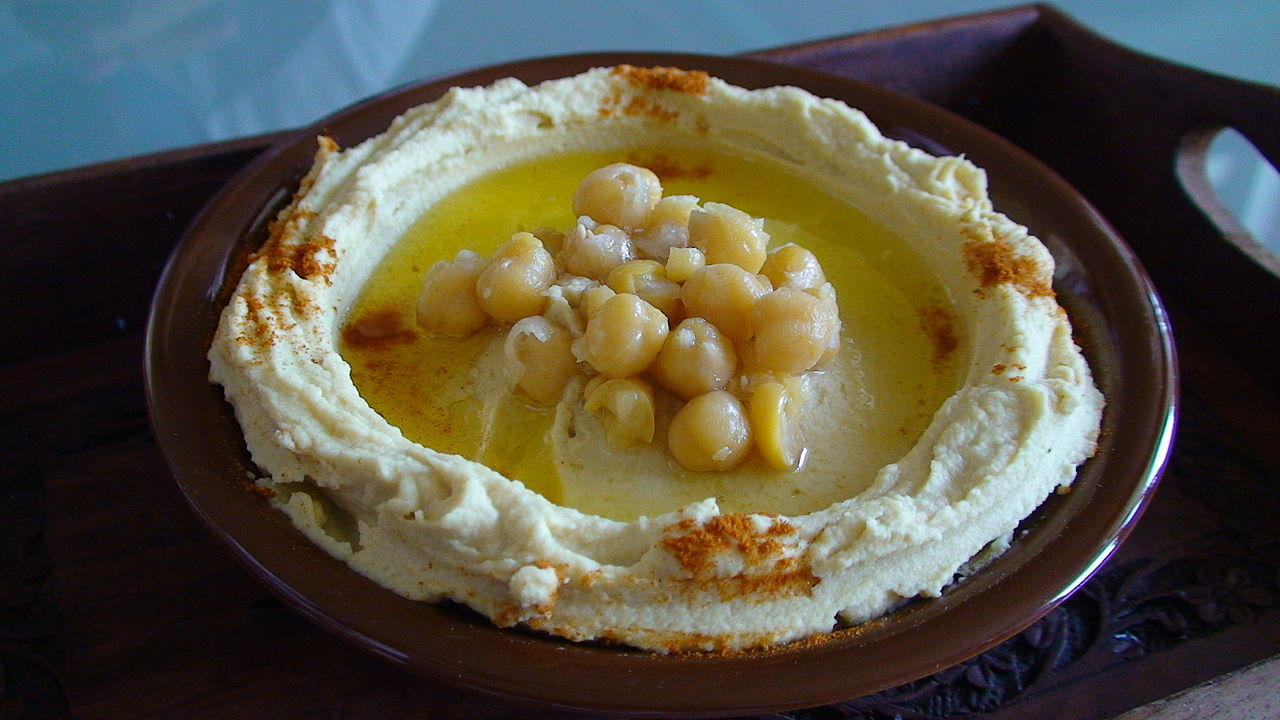
There are more "pro" naf-nafs – here's one that came with a package of hummus, by a renowned Israeli salad manufacturer. The reason there was a mangal fan in the humus package is because hummus is a must in an Israeli barbeque ("al-ha-esh").
Example:
Israeli guy 1: "We're having Al Ha-esh on Friday, come! I'll do the kebab."
Israeli guy 2: "Ahla, I'll bring the hummus."
 You can "lemangel" with a commercial naf-naf,
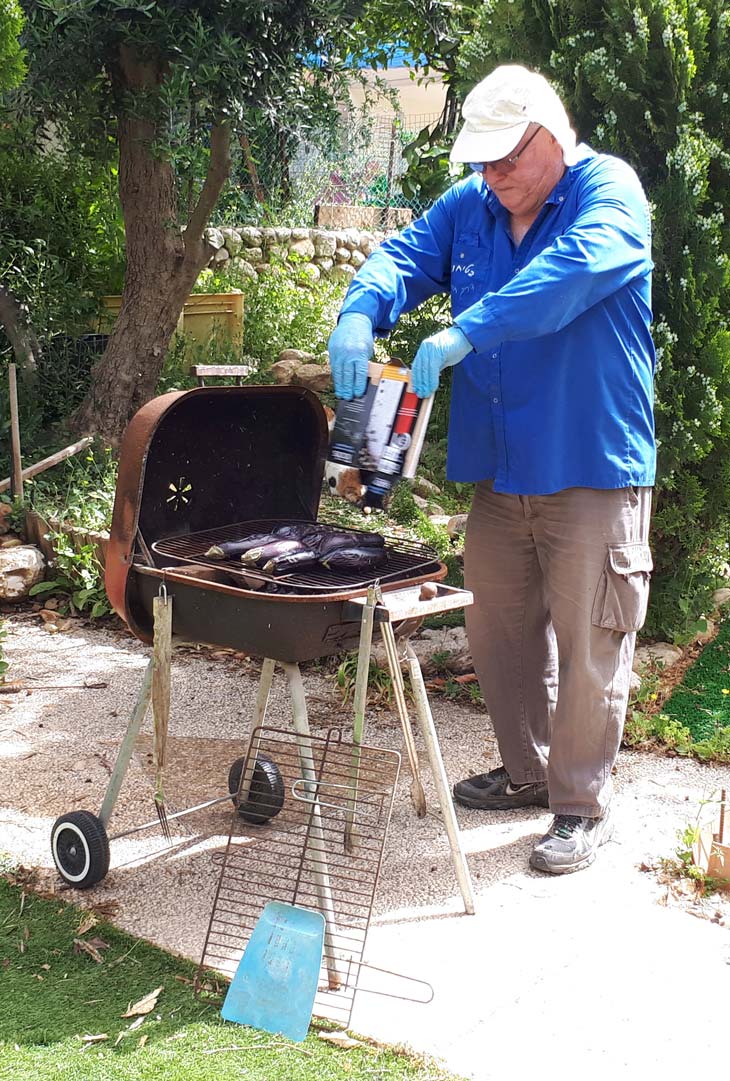 ...or with a large piece of carton.
My dad flips them again (4th time), cut facing down again.
Dad: "It looks very meaty, like a good steak. Now we wait another certain time".
Me: "How long is 'a certain time'? "
He laughs and goes off to feed the cats. 'Certain time' turns out to be about 5 minutes. He's been doing this for decades, and doesn't stand around with a stopwatch. He just prods the eggplants with the long fork, playing with them, feeling if they've softened up yet.
They've all softened up.
Now we close the lid of the grill and wait another 10 minutes.
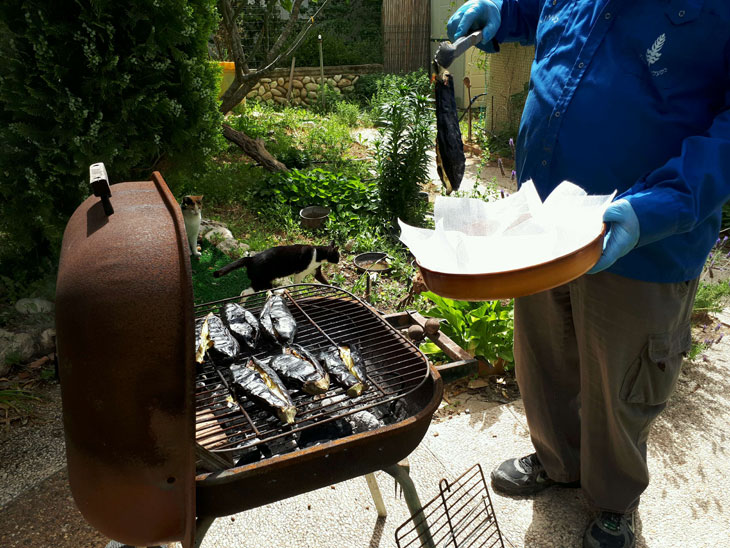
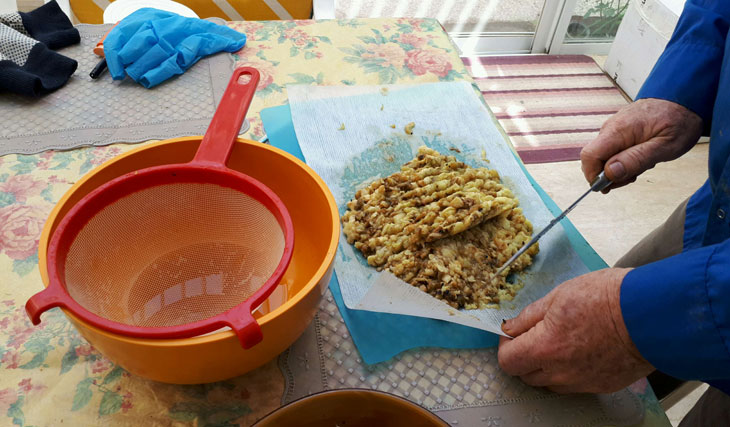
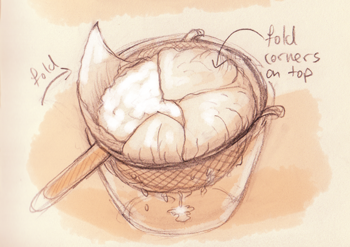
While we wait, we find a suitable large flat bowl, and line it with non-absorbent paper. This paper is like diaper lining –it lets fluids pass thru without soaking or tearing. If you don't have that kind of paper, a colander will do instead.
Time to Come Off the Grill
Place the roasted eggplants on the paper (or colander), and let them cool and drain some more. (Do you see a recurring theme here? LOL)
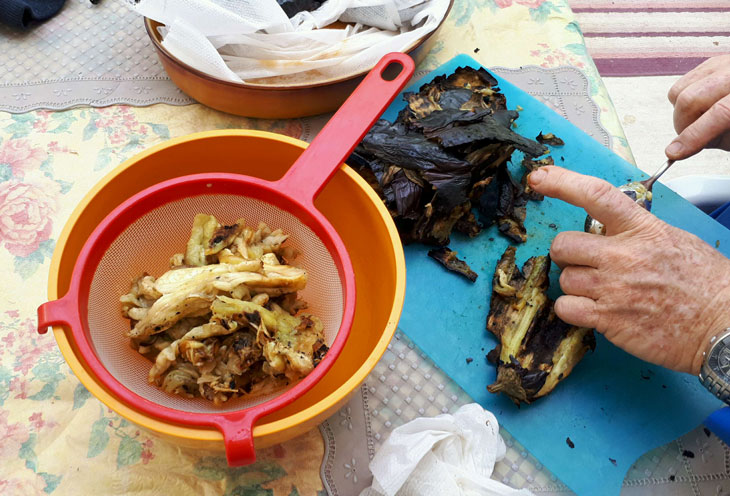
Now comes the fun part – cleaning them out of their skins. Oohhhh they smell so good!
You'll need a large colander, a matching bowl to hang it in, and a spoon.
Sit down ;) get comfortable, have a coffee. Wait for them to cool down enough to handle.
Take an eggplant, and with the spoon, scrape out the cooked insides from the skin. If burnt bits stick to the good stuff, be sure to get it off. It's not too terrible if a few charred bits make their way into the salad – it will give it a smoky taste, but don't do it on purpose.

 This part is a little messy
We let the roasted eggplant drain in the colander, while my dad cleans up and gets the sweet peppers off the fire. (We got an OK from mom to add them to the eggplant salad, along with some fresh chopped garlic. Yum.)
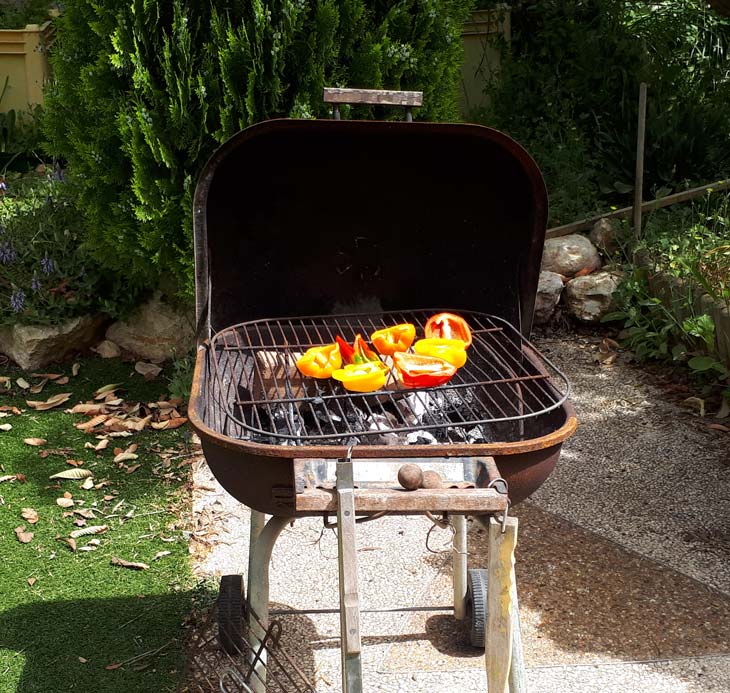 roasted peppers
Chop Chop Chop!
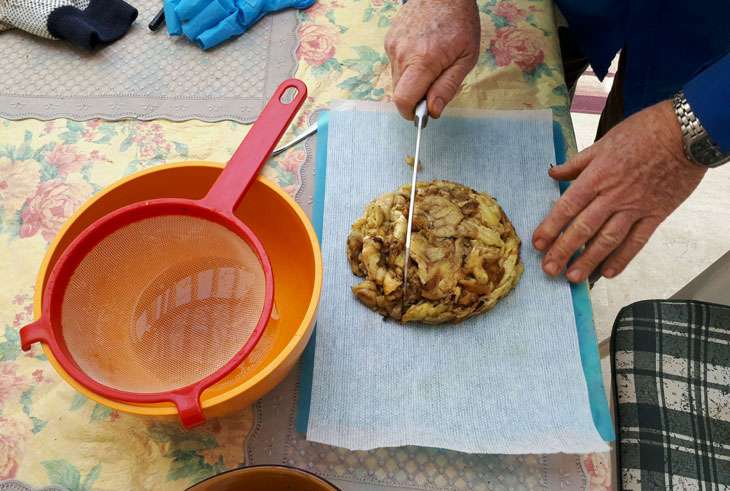
When the dripping slows to an occasional drip, take the colander and up-end it onto a sheet of paper spread on a chopping board. If you don't have this paper – just slap them on the chopping board.
Chop-Chop-Chop!
With a sharp big knife, chop the eggplants in one direction, then across.
Fold them over and chop again.
Chop till you get a texture you like. Some people like a mash, a paste. We prefer a chunky texture.

Optional:
Chop the roasted peppers and add to the roasted eggplants.
Chop some fresh garlic into slivers and add them too.
Just carry on the rest of the process with the peppers and garlic in the mix.
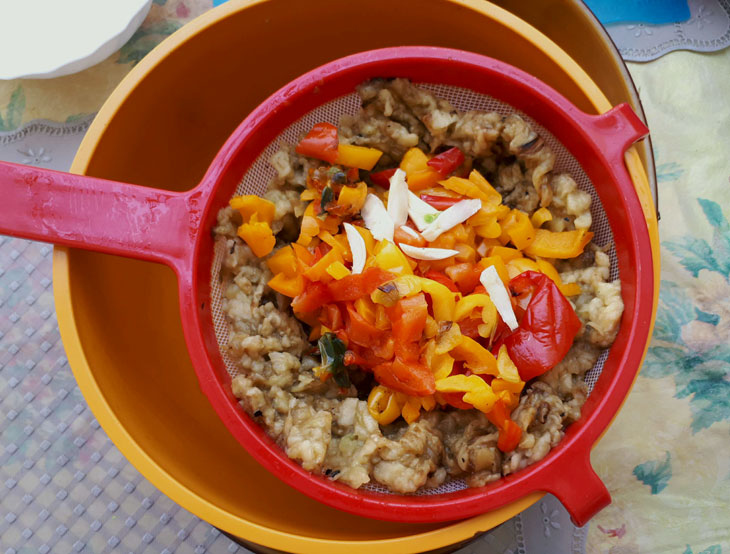 You can add peppers and garlic now, or later, or not at all -
 depending on what you plan to do with the eggplants eventually.
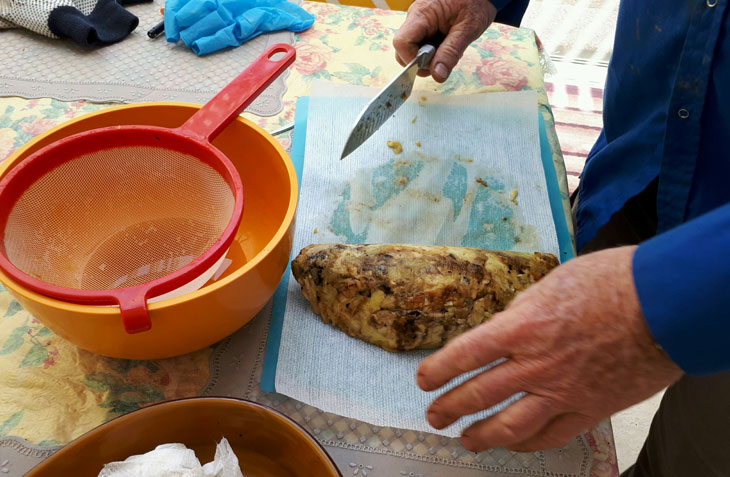
Put the chopped eggplants back in the colander – to drain some more.
Push the mass around the sides of the colander to improve the draining.
Last Stage of Draining
These eggplants were very fresh, and cooked fast and well, and drained well.
If they cooked properly on the fire, you can eat them right away.
If they didn't, or if you got unlucky and the eggplants had lots of seeds, you'll want to set them up to drain for 24 hours.
Here's how:
Slap the mass on a large chopping board.
Chop again if you want it finer.
Spread the roasted eggplants in an even layer.
Now we make "shvilim" – pathways in the mass.
Sprinkle just a bit of salt over the whole mass. The salt will help more fluids come out.
Place the chopping board with the mass on it at an angle over the kitchen sink, or over a big enough pan. The fluids will drain along the pathways.
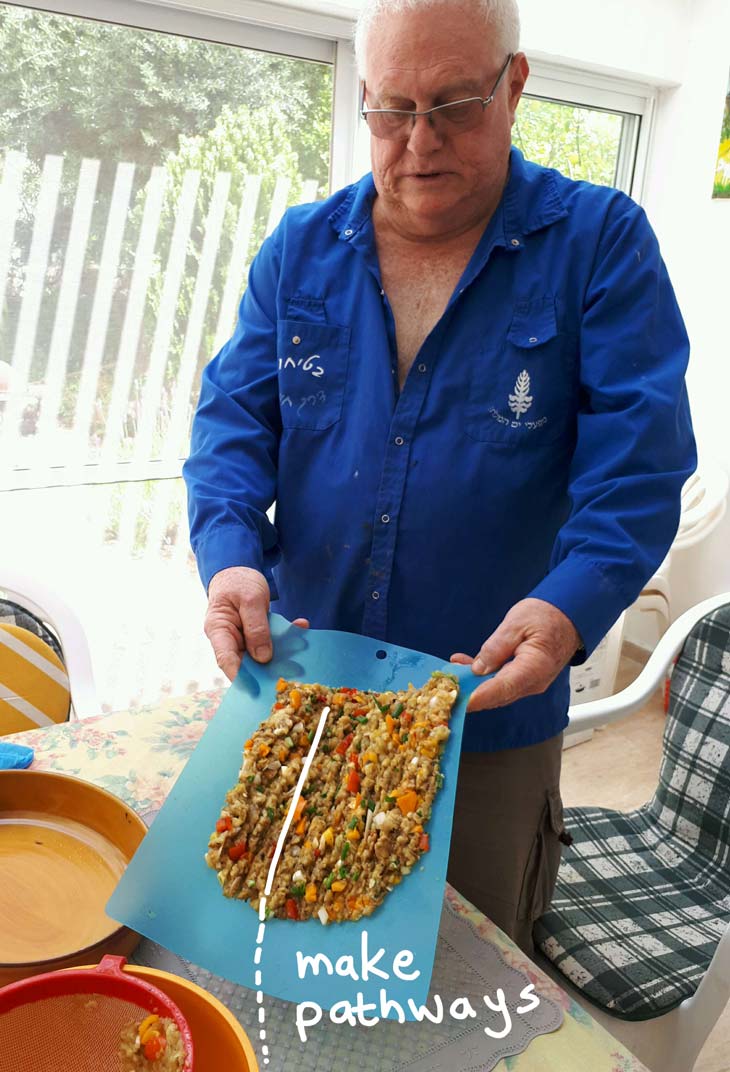
The Roasted Eggplants are ready when no more fluids come out.
You now have a delicious primary ingredient for endless eggplant salads!
Troubleshooting
If the eggplants were not very fresh, or if they didn't cook enough on the grill, you can cheat a bit and finish cooking them in the microwave.
Sometimes the stings don't cook all the way.
Put your undercooked eggplants in a couscous dish* – so, you guessed – they can drain as they cook. How much fluid comes out of them in the microwave is related to how under-cooked they were.
*A couscous dish is a pot with two stories – a sieve inside a pot. A kind of steamer.
The Condensed Practical recipe
Ingredients and tools
- Fresh eggplants
- Pinch of salt
- A grill with charcoals
- Grill fork
- Grill Tongs
Instructions
- Make a deep cut along the middle of each eggplant (don't cut in two)
- Place over hot charcoals, with the cut facing DOWN.
- Roast for about 10 minutes, until they start turning from purple to brown.
- Turn over so the cuts face UP, and fan the coals.
- Roast for another 10 minutes. You should see boiling bubbles inside the eggplants.
- Turn the eggplants again. With the cut facing down, to let all the fluids drain, for about 5 minutes.
- Turn again, check if cooked. Continue roasting until the color of the skins has blackened, and they start peeling. The insides should look "meaty". Check with a fork to see if they've softened.
- Continue roasting until they've gone all soft.
- Once they've softened, close the lid over the grill for about 10 more minutes.
- Take the eggplants off the grill, place on a net or non-tearing paper towels.
- Let them cool and drain a while.
- When they are cool enough to handle, carve out the insides of the eggplants with a spoon, and place the mass in a colander to drain.
- When the dripping slows to an occasional drop, put the roasted eggplants on a chopping board.
- Chop to a rough texture.
- Return the mass to the colander and allow it to drip some more.
- If necessary to continue draining the bitter fluids (especially if the eggplants have many seeds), do the following:
- Spread the mass in an even layer on a large chopping board.
- Chop them some more, and make pathways, ruts, along the mass.
- Place the board at an angle above the sink or over a large pan, so the fluids will run along the pathways and drain.
- Allow to drain for 24 hours.
You now have ready roasted eggplants!
You can continue chopping to the texture you like. Some people like a chunky salad, but some recipes work better with a paste.
What to do with your wonderful roasted eggplants, now they're ready:
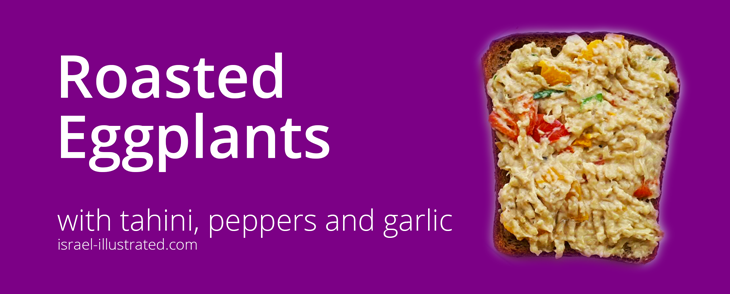
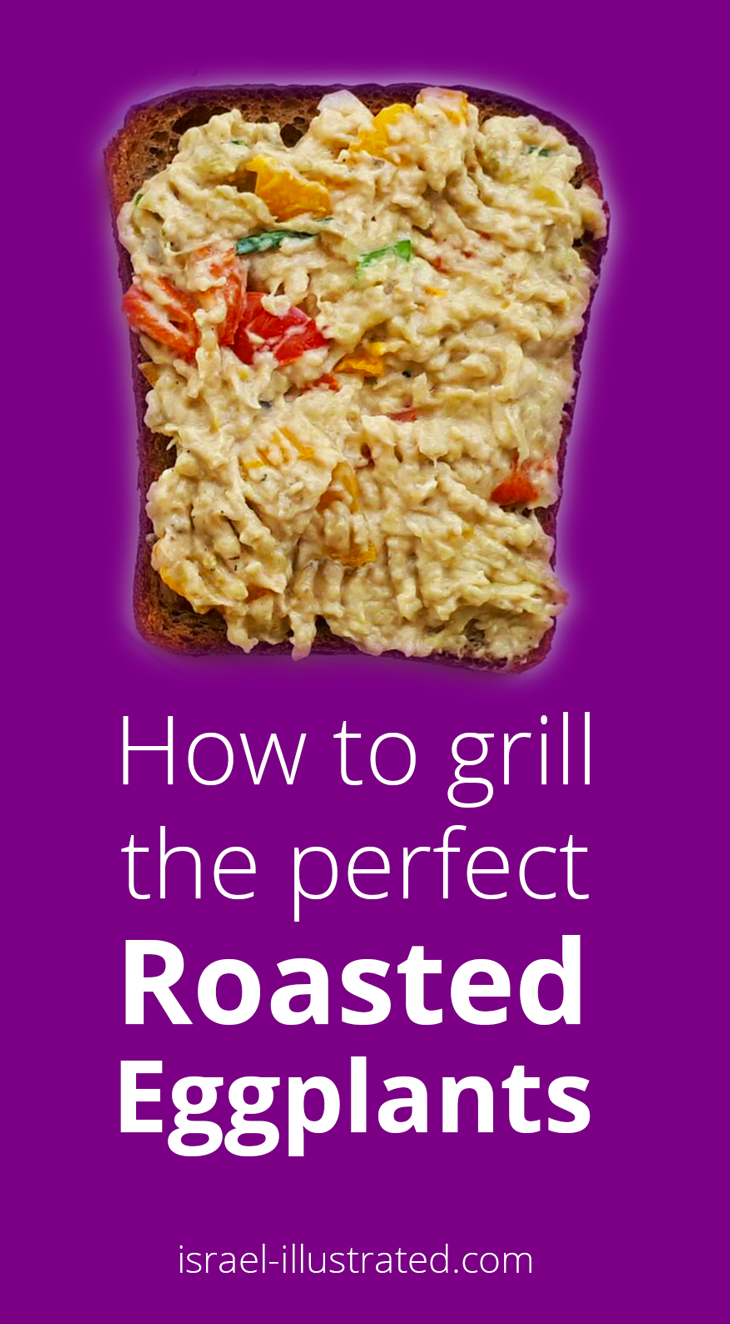
Roasted eggplants with peppers and tahini recipe
This is the version we just cooked – the roasted peppers are already inside the eggplants mix:
Ingredients
- Prepared mix of roasted eggplants, with roasted peppers.
- Fresh garlic, chopped into small chips
- Fresh scallions, chopped into small rings.
- Raw tahini
- Lemon juice from one lemon
- Salt
Optional:
- Toasted rye bread, or
- Pita bread, cut into quarters.
Instructions
- Chop and mix the roasted eggplants and pepper mix with the chopped garlic and scallions.
- For 2 spoons of the eggplants mixture, add 1 spoon of raw tahini, 1 spoon of lemon juice, and a pinch of salt.
- Mix well, until the tahini absorbs the juices, and you get a consistent mixture.
- Add lemon juice if necessary, if the consistency is too dry.
- Taste and add salt if you feel it's needed.
Spread a thick layer on toast, or inside a quarter of Pita.
More delicious ideas for roasted eggplants recipes:
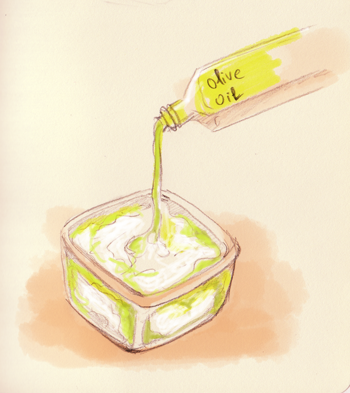
- As-is, with olive oil and salt
- Mix with Mayonnaise
- Mix with tofu. Prepare the tofu to your liking, and mix with the prepared roasted eggplants.
- Mix with minced meat, and use as filling for Stuffed Peppers.
- In the Romanian version, they add fresh, chopped white onion.
Be-te-a-von! (Bon Appétit)
 Thanks Dad!
Follow Me on Instagram:
https://www.instagram.com/nettacanfi/
Home > Israeli Food > Roasted Eggplants

Recent Articles
-
Children Drawing at War
Dec 07, 23 09:02 AM
 Children of Sderot, Israel, drawing their hopes and fears. I work with the evacuated kids now at the Dead Sea hotels, and what they draw is very revealing
 -
Israel 2023 - Illustrated War Journal by Netta Canfi
Oct 29, 23 04:39 PM
 An Illustrated War Journal, created in real time: Israeli artist Netta Canfi draws her experiences in the Israel-Hamas War.
 -
War Israel Hamas
Oct 10, 23 01:22 PM
 Hamas massacres Israeli civilians in music festival and Kibbutzim on Gaza border. Hostages taken into Gaza, at least 900 Killed
Home | Blog | Art and Culture | Coloring Pages | Covid19 in Israel | Life in Israel | WAR | Climate | Food
Contact Us | About | Legal
israel-illustrated.com / il-lustrated.com all rights reserved 2016-2023